Chameleon Skin Protections are custom-shaped to protect your bike from scratches, scuffs, small dents, dirt, abrasions, stone shot, impacts and during transport. They ensure perfect aesthetics and protect your investment. Chameleon Skin Protections are 100% designed and made in Italy using high quality polyurethane: ultra clear, durable and easy to apply.
You can go riding without having to worry about damaging your baby. Enjoy!
IMPORTANT: read instructions thoroughly before beginning application.
Application Tools Needed
- Plastic squeegee (supplied with the kit)
- Microfiber cloth (supplied with the kit)
- Installation solution (supplied with the kit)
- Cleaning wipes (supplied with the kit)
- A 1-liter Spray Bottle
- Degreaser or bike detergent (i.e., Muc-Off)
- A hairdryer (not heat gun)
- A bike stand may be helpful
- Time and patience
General Installation Instructions


(IMPORTANT: Read instructions thoroughly before beginning application)
General Installation Instructions:
- Installation should always be performed in a clean, well-lit environment with a temperature between 15° and 32° C (60° to 90° F). Application should never be performed in windy conditions or in direct sunlight.
- Prepare an “installation mix” in the spray bottle, by filling the bottle with 1 liter of water and adding 0.5/0.75ml (approximately 4 or 5 drops or less than half a teaspoon) of the “installation solution” supplied with the kit. Note: depending on the hardness of the water “solution” quantity may vary. Too much “solution” will make adhesion slow and difficult (especially at the edges), with not enough “solution” the film will adhere more rapidly making it difficult to expel the water and facilitating the formation of bubbles. The water /solution mix may be adjusted at any time. Note: matte film may require less “solution”.
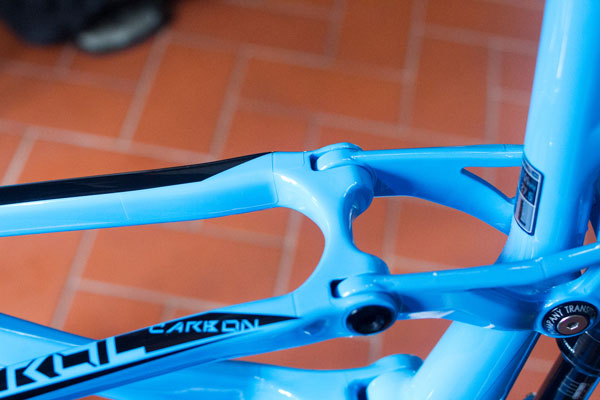
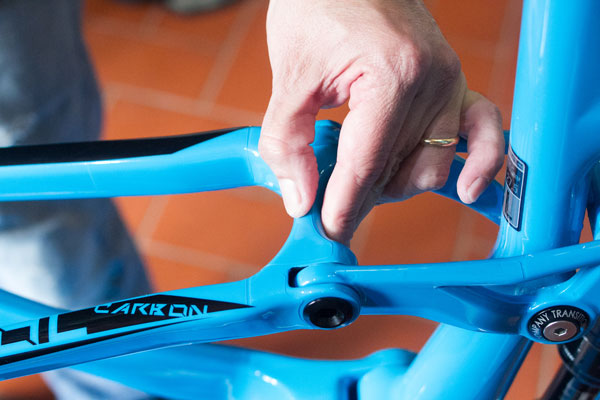
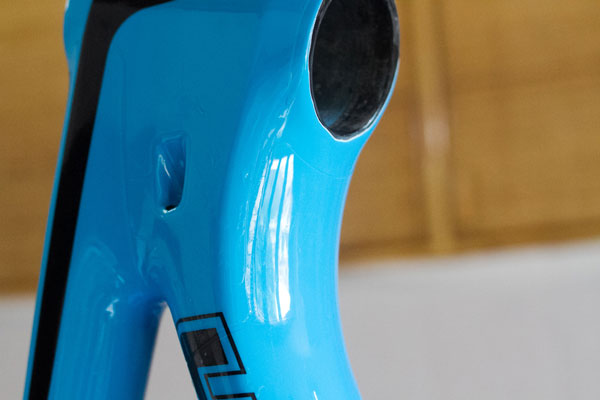
- Use the supplied cleaning wipes to clean the frame. Contamination such as grease, oil, silicone, and dirt must be removed from the frame, any residual of lubricants will affect adhesion. The cleaner the surface is, the faster and easier will be the installation. Pay particular attention around the head tube, bottom bracket, axle and shock link bolts areas. Note: if a PTE or silicone-based spray has been used to shine the frame, wash thoroughly with bike cleaning/degreasing detergents such as Muc-Off. If the bike has been ridden, wash thoroughly with water and detergent the frame and all other parts.
- Read the part diagram instructions supplied and identify each piece of the kit, the layout will be the same. Note: in the diagram sheet specific installation order and hints may be suggested according to make and model.
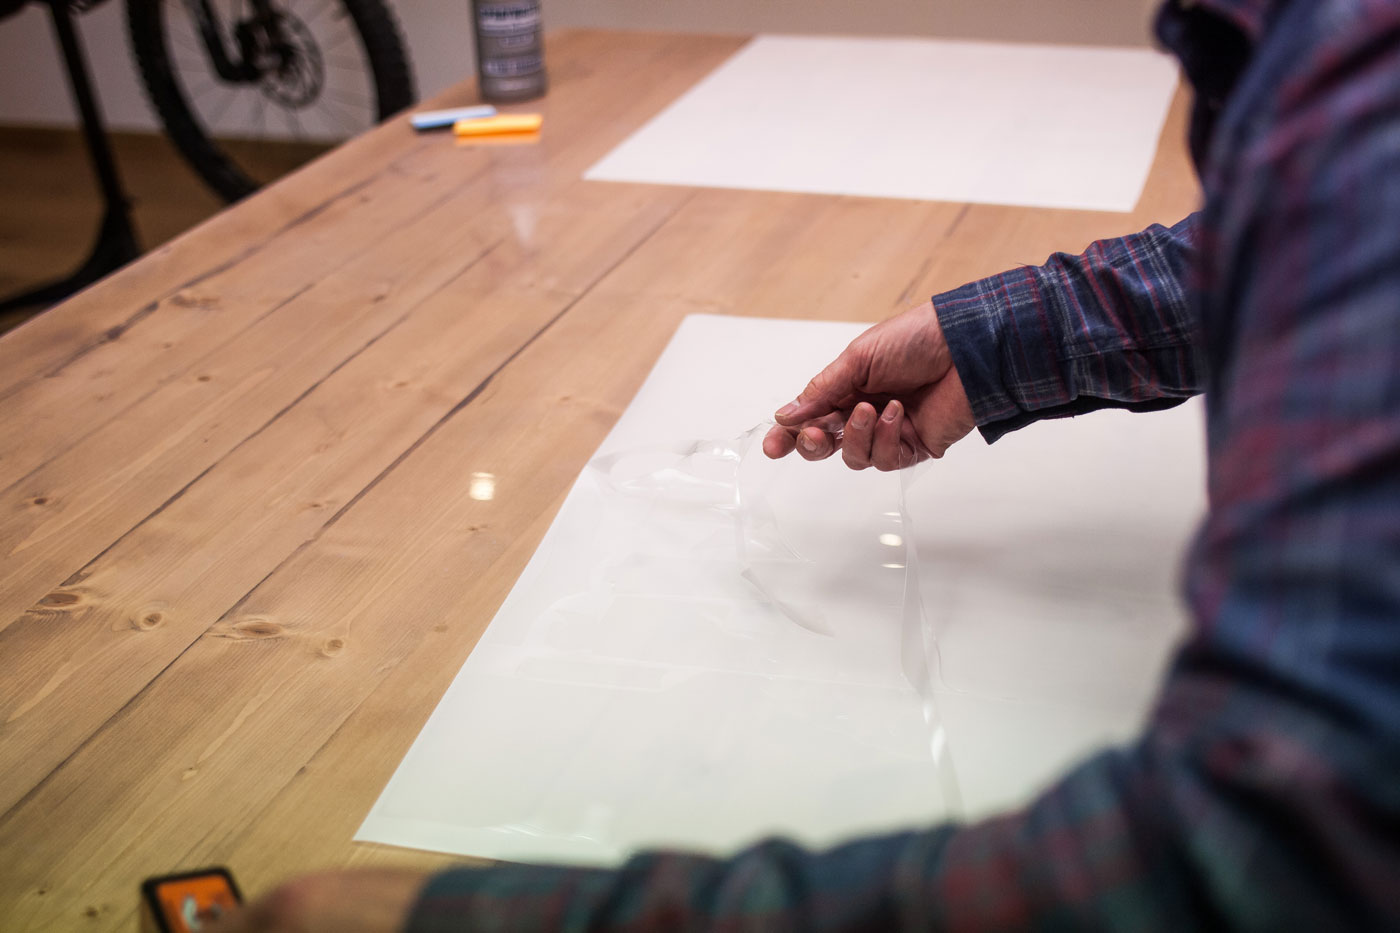
- Wash hands thoroughly before you begin and keep them clean during installation. Fingers should always be kept wet with the installation mix when handling the film. This is important, as it will prevent fingerprints on the adhesive.
- Spray the installation mix generously on the part of the frame you are about to apply the decal. Spray your fingers, then gently peel the required shape off the underlay and spray both sides of the film.
- Place the decal on the frame, the slip will help you align the part properly into position. Some parts (generally the long ones) may have small notches to facilitate alignment. Spray the soap solution on the surface of the part, this will help the squeegee glide and prevent it from leaving marks.
- Once the part is aligned, use the squeegee to expel water and air bubbles starting from a center line and working your way towards the edges. Using overlap strokes with the squeegee and you hand will help avoid leaving bubbles. Take your time, there’s no rush. On larger parts it may occur that as you work on one side, the areas you have not yet squeegeed dry out a bit, simply pull back the decal gently and spray the surfaces again. In some small curves and contours or tight areas where the squeegee does not fit, use your fingers to expel air and moisture. However, it’s recommended to keep wet the surfaces you are working on. Dry off excessive water with a lint free cloth. Use the hair dryer to dry out areas where the film is not sitting completely or to accelerate adhesion. DO NOT OVERHEAT THE FILM, this will damage it permanently.
- Stretching the film is not recommended as it may compromise precision. However if necessary, thanks to the film’s elasticity some gentle stretching may be used to match frame, edges or curves as desired. Note: remember to have wet fingers when you touch the adhesive.
Note: due to the fact that this is a wet application, in some areas complete adhesion may take more time. If this occurs, don’t get frustrated, move on to another part giving it some time to let the water evaporate and get back with it later. Application on matte frames may take more time.
seful Tips: Sometimes it’s possible that small creases that refuse to adhere form along the edges, usually this is caused by the film is not spread out properly. Try keeping it pressed down for about 1 minute. If this doesn’t work, rather than insisting to make it stick, it may be useful to lift the film at the point of the crease and on it’s sides for few centimeters and spread it out again with your fingers. The same can happen in curves and concave points, where the film does not adhere in the center of the curve. In this case, gently pull back the film and reapply it starting from the deepest point of the curve.
10. If it’s necessary to reposition a part, or if you find that you have trapped dirt, hairs, air or an excessive amount of solution, or you are not satisfied with the alignment, the material may be gently pulled back up. As long as the adhesive is still wet, you can reposition it as many times you want (remember to keep your fingers wet when handling the film). Film should not be removed after 5/10 minutes from installation. If you need to reposition a piece when adhesion is already in progress (not suggested), pull back the film gently and very slowly. This operation is very delicate and requires extreme care! Some frames, particularly the carbon ones, may have small invisible paint defects, which if stressed, could cause aesthetic damage.
Note: plastic and rubber protectors, head tube badges and other parts pre-installed by the bike manufacturer are not always installed in the same position. This occurs also with welds and in some cases with cable route and water drain holes. We keep this in consideration when we design our kits by leaving some tolerance, but sometimes these parts are so out of position that some trimming may be necessary during installation.
11. Once you have installed all the parts, let the decals dry completely overnight or at least for a few hours. Very Important: at this point inspect all parts and go through all the edges pressing them down with your fingers. If you find any air or liquid bubbles you can eventually use a syringe needle (an insulin syringe would be recommended) to carefully puncture a little hole. Note: We suggest waiting 24 hours before riding the bike and 48 hours before washing it.
Removal
If in future you decide to remove or replace parts of your kit, don’t just rip them off, as by doing so you may damage your frames paint. Using a hair dryer (not a heat gun), warm up the decal in order to reactivate the adhesive, lift a corner and start pealing the film at a sharp angle. Keep heat in the area where it’s pealing from the frame. Do not peal at a 90° angle.
Directions for Use (Important)
- If you use a bike carrier for transportation, it is absolutely necessary to put a cloth folded a few times between the retaining clamp and the frame, direct contact could damage the film.
- If you need to use plastic cable ties, such as to fix a mudguard to the forks, do not over tighten them.
If you are unsure about how to attempt any stage of the installation or removal, be sure to contact us.
Disclaimer
The techniques described here are intended as an overview of the vinyl manufacturer’s suggested installation and removal methods. No responsibility is implied or given for property damage, injury or any other liability resulting from the use of these methods, or the installation of decals on any surface.
Bestseller
-
 Select options This product has multiple variants. The options may be chosen on the product page
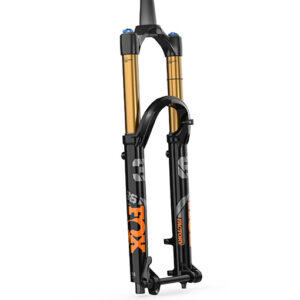
Fox 38 2021-2024
€38,00 -
 Select options This product has multiple variants. The options may be chosen on the product page
Generic Protection Kit for Road and Gravel Frame
€64,00 -
 Select options This product has multiple variants. The options may be chosen on the product page
Generic Protection Kit for Full Suspension Frame
€64,00 -
 Select options This product has multiple variants. The options may be chosen on the product page
Specialized Turbo Levo S-Works – Pro – Expert – Comp Carbon 2022-2024
€104,00 -
 Select options This product has multiple variants. The options may be chosen on the product page
Generic Protection Kit for E-BIKE
€74,00 -
 Select options This product has multiple variants. The options may be chosen on the product page
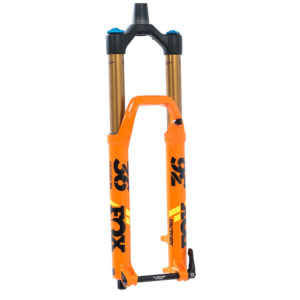
Fox 36 2021-2024
€38,00 -
 Select options This product has multiple variants. The options may be chosen on the product page
Orbea Rise Carbon 2021-2022
€104,00 -
 Select options This product has multiple variants. The options may be chosen on the product page
Fox 36 Boost & 36 Rhythm 29″- 27,5″+ / 2017-2022
€25,00


